Antenna Launcher User Manual (updated 12/2022)
Introduction
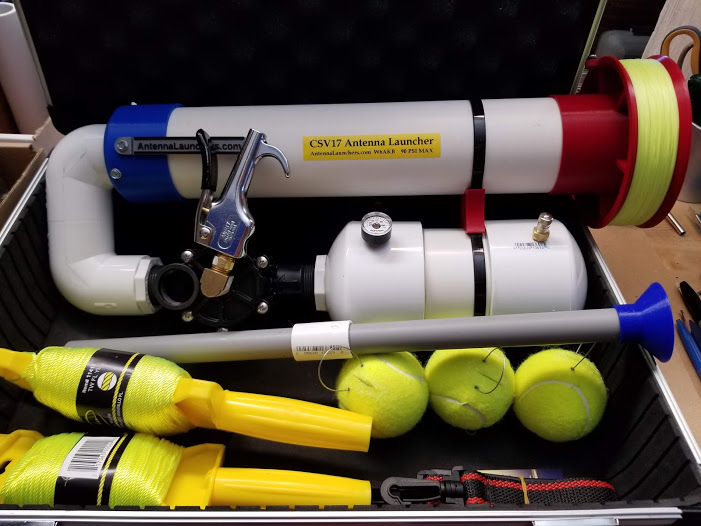
This document covers use of the CSV19, CSV23, CSV17, PADS and LPAL Pneumatic Antenna Launchers for launching lines. These lines are typically used for hoisting antennas for Emergency Services and Ham Radio use. These systems have been designed to increase the safety and efficiency of this activity compared to the common techniques of slingshots and metal weights or bow and arrow launching.
These launchers use air pressure to launch tennis balls towing light fishing line over trees. The tennis balls are launched at velocities lower than a Tennis Serve. The balls are slightly weighted to tow the line better and reduce the velocity needed. They are soft and highly visible to increase safety.
For more information on Antenna Launching and Antenna Launchers see the web at www.AntennaLaunchers.com.
This document is available online at Antenna Launcher User Manual.
Building a Launcher
If you are building a launcher from our current kits, we have new instructions (2019-2) and the previous (2019-1 and 2010) instructions. The newest (2019-2) instructions include a number of updates and add the new 3D Printed Barrel Endcaps and should be used for all threaded kits. The older instructions are maintained for those who started with them, or who wish to refer to them. All the instructions are listed under the Info link here.
The (2019-1) instructions are a major rewrite and include the 3D Printed barrel-chamber Spacers which started shipping in late 2017. The 3D printed barrel endcap is secured with screws instead of cement to make the launcher more serviceable in case of damage.
If you have an older kit which is missing the new 3d fitted barrel-chamber spacers contact us about getting these parts, it will make your kit much stronger, or you can follow either the 2010 or the more detailed 2019 instructions. The instructions are linked from the Info page. If you start with one set of instructions it is generally best to stick with them, the order of assembly is somewhat different and it could be confusing to change mid-stream.
If you are building a launcher from a very old kit (which uses the slip-fit cemented main valve instead of the later threaded main valve parts), or you want to build from scratch, see the Pneumatic Antenna Launcher Instructions from 2008 which have more detailed parts making directions as well as assembly.
If you are preparing Tennis Balls for Launching Service, see Launch Ball Prep, or refer to about page 36 of the (2019-2) Launcher Instructions.
If you purchased a pre-assembled launcher the only assembly is putting the ramrod handle into the ramrod end. We have used various ends for ramrods, so this could be a PVC bushing or it could be a plastic funnel shaped part that is a friction fit on the end of the ramrod. You can cement this or not, generally it is not necessary.
If you purchased a Reel from us it friction fits onto the launcher. Do not make it too tight, you will want to remove it during retrieval and storage of the launcher. Do not cement the reel to the launcher.
Linear Pneumatic Antenna Launcher (LPAL)
The new LPAL launcher is a linear variation on the CSV launchers that fits into an 18 inch tool case. It is easily assembled for use and disassembled for transportation and storage. 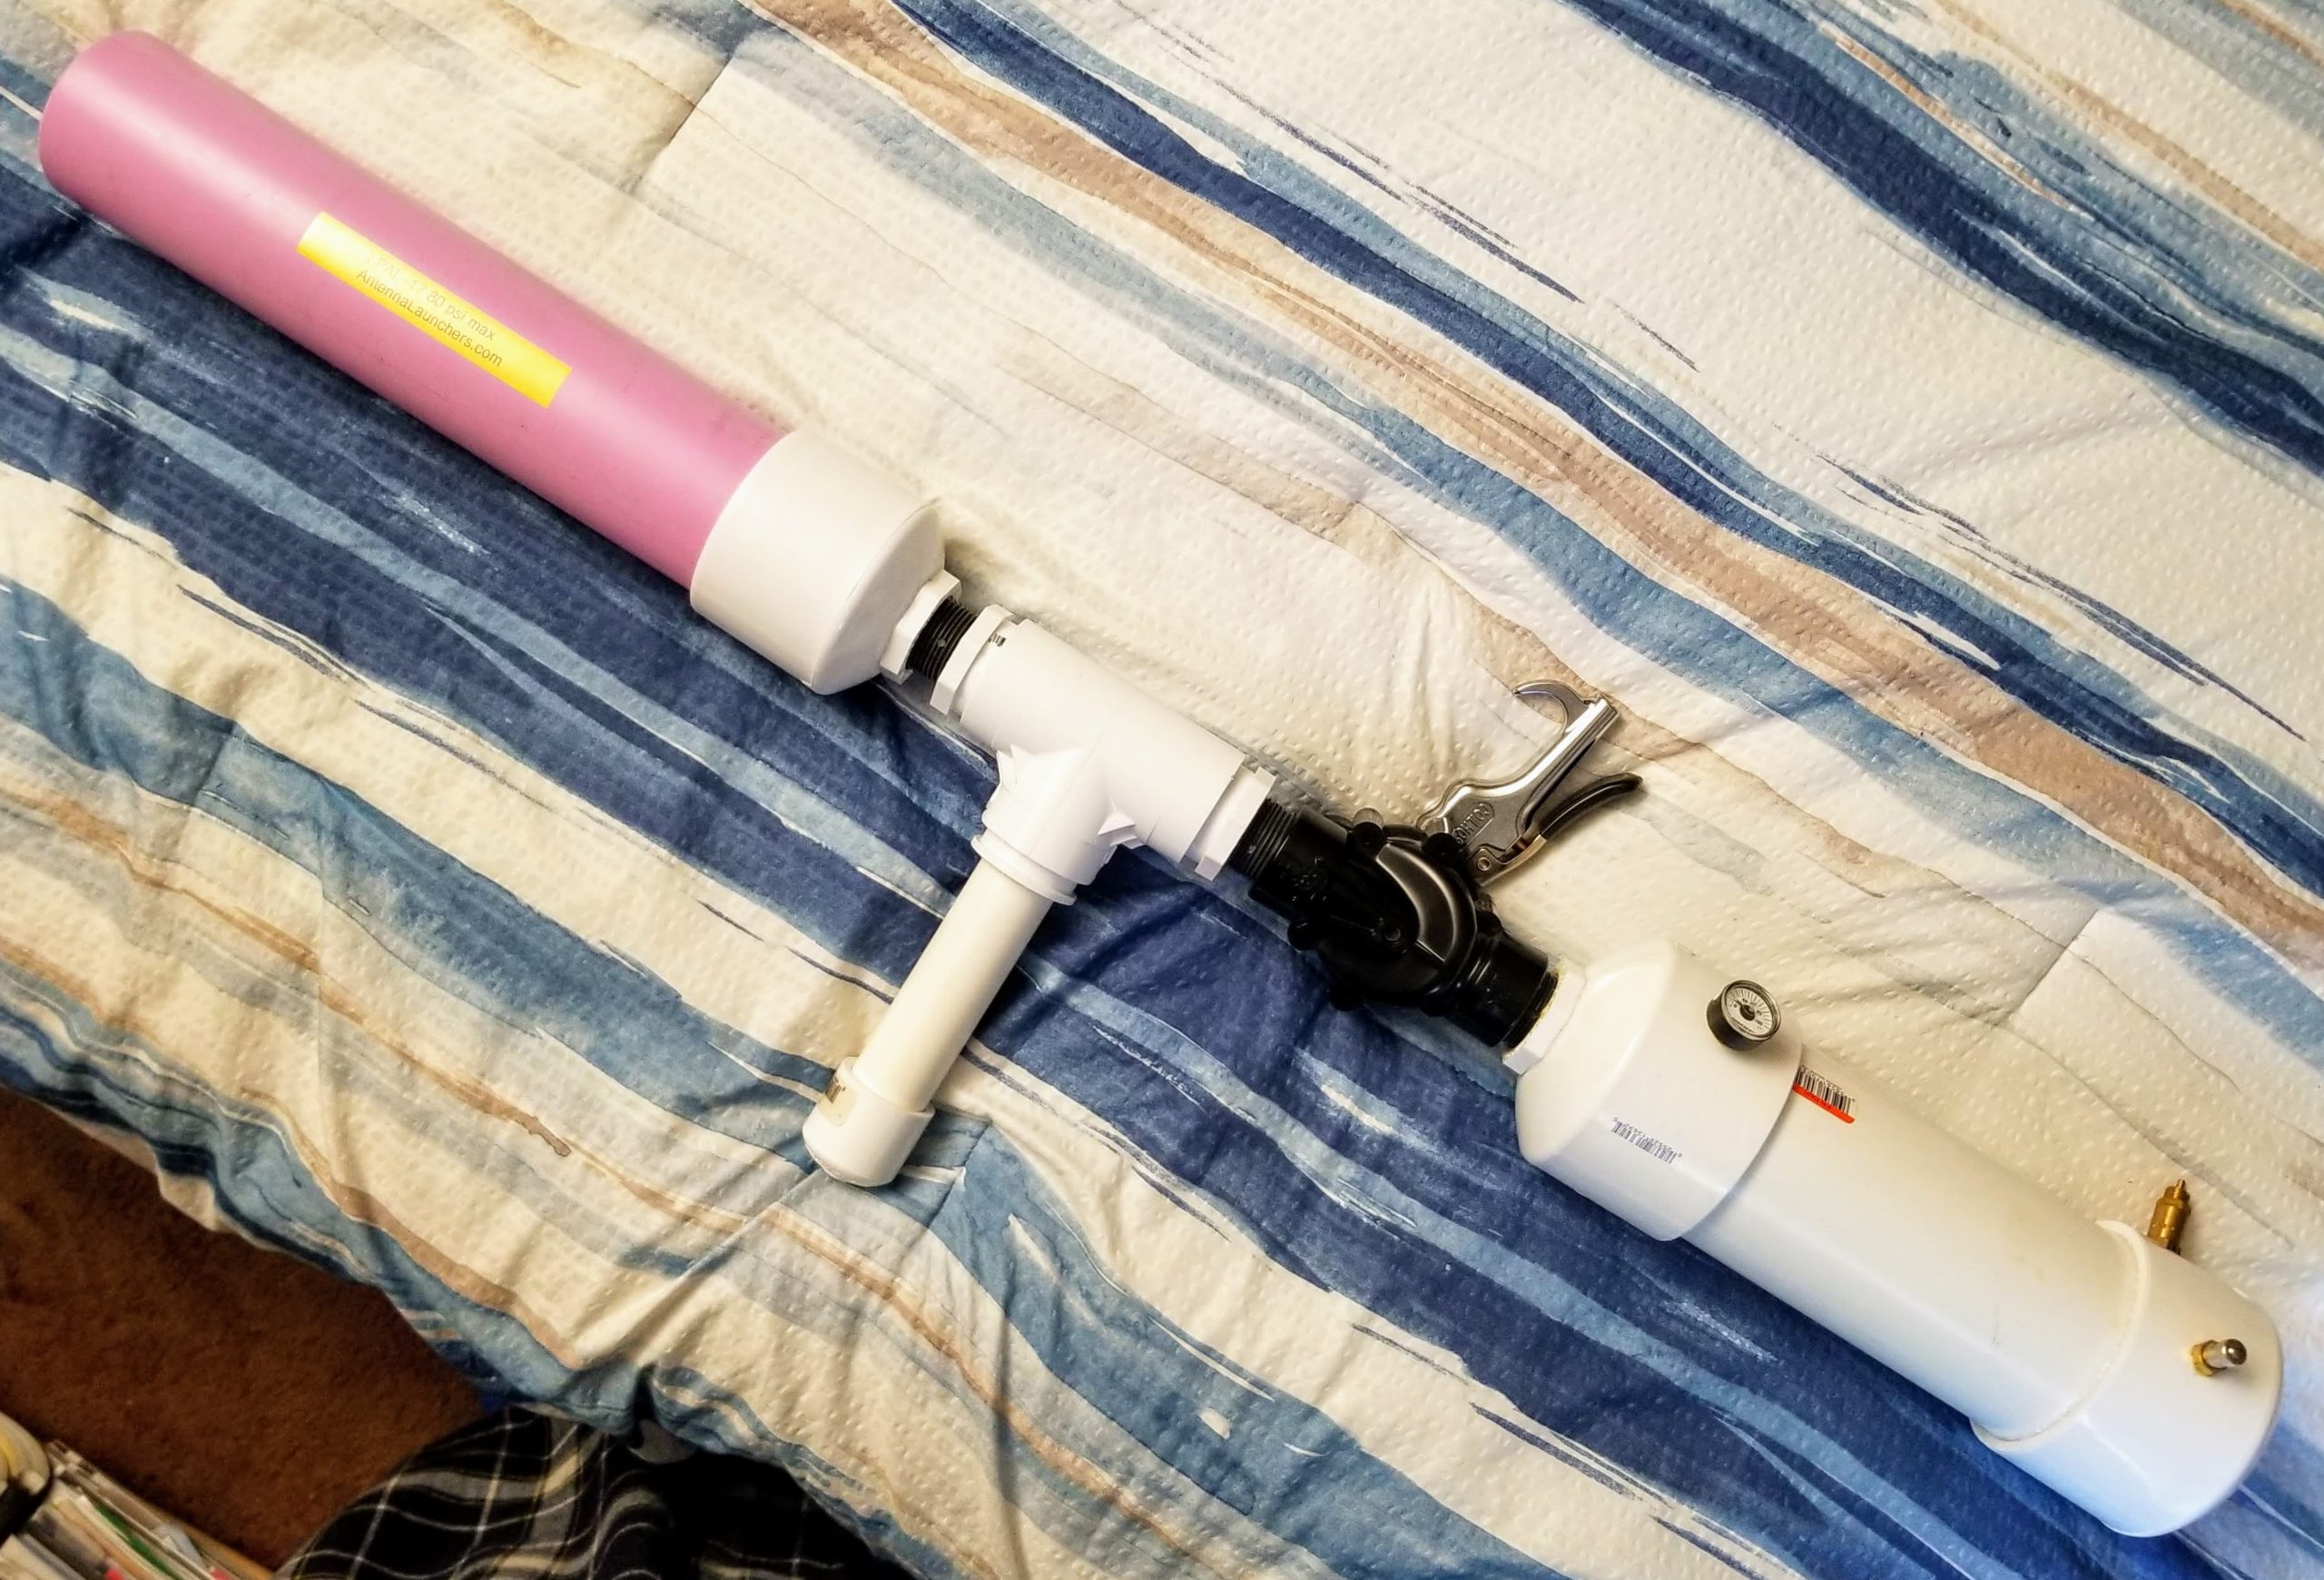
The barrel/endcap and pressure chamber/valve units thread onto the central handle. DO NOT TIGHTEN, they only need to be finger tight. After use disassemble for storage.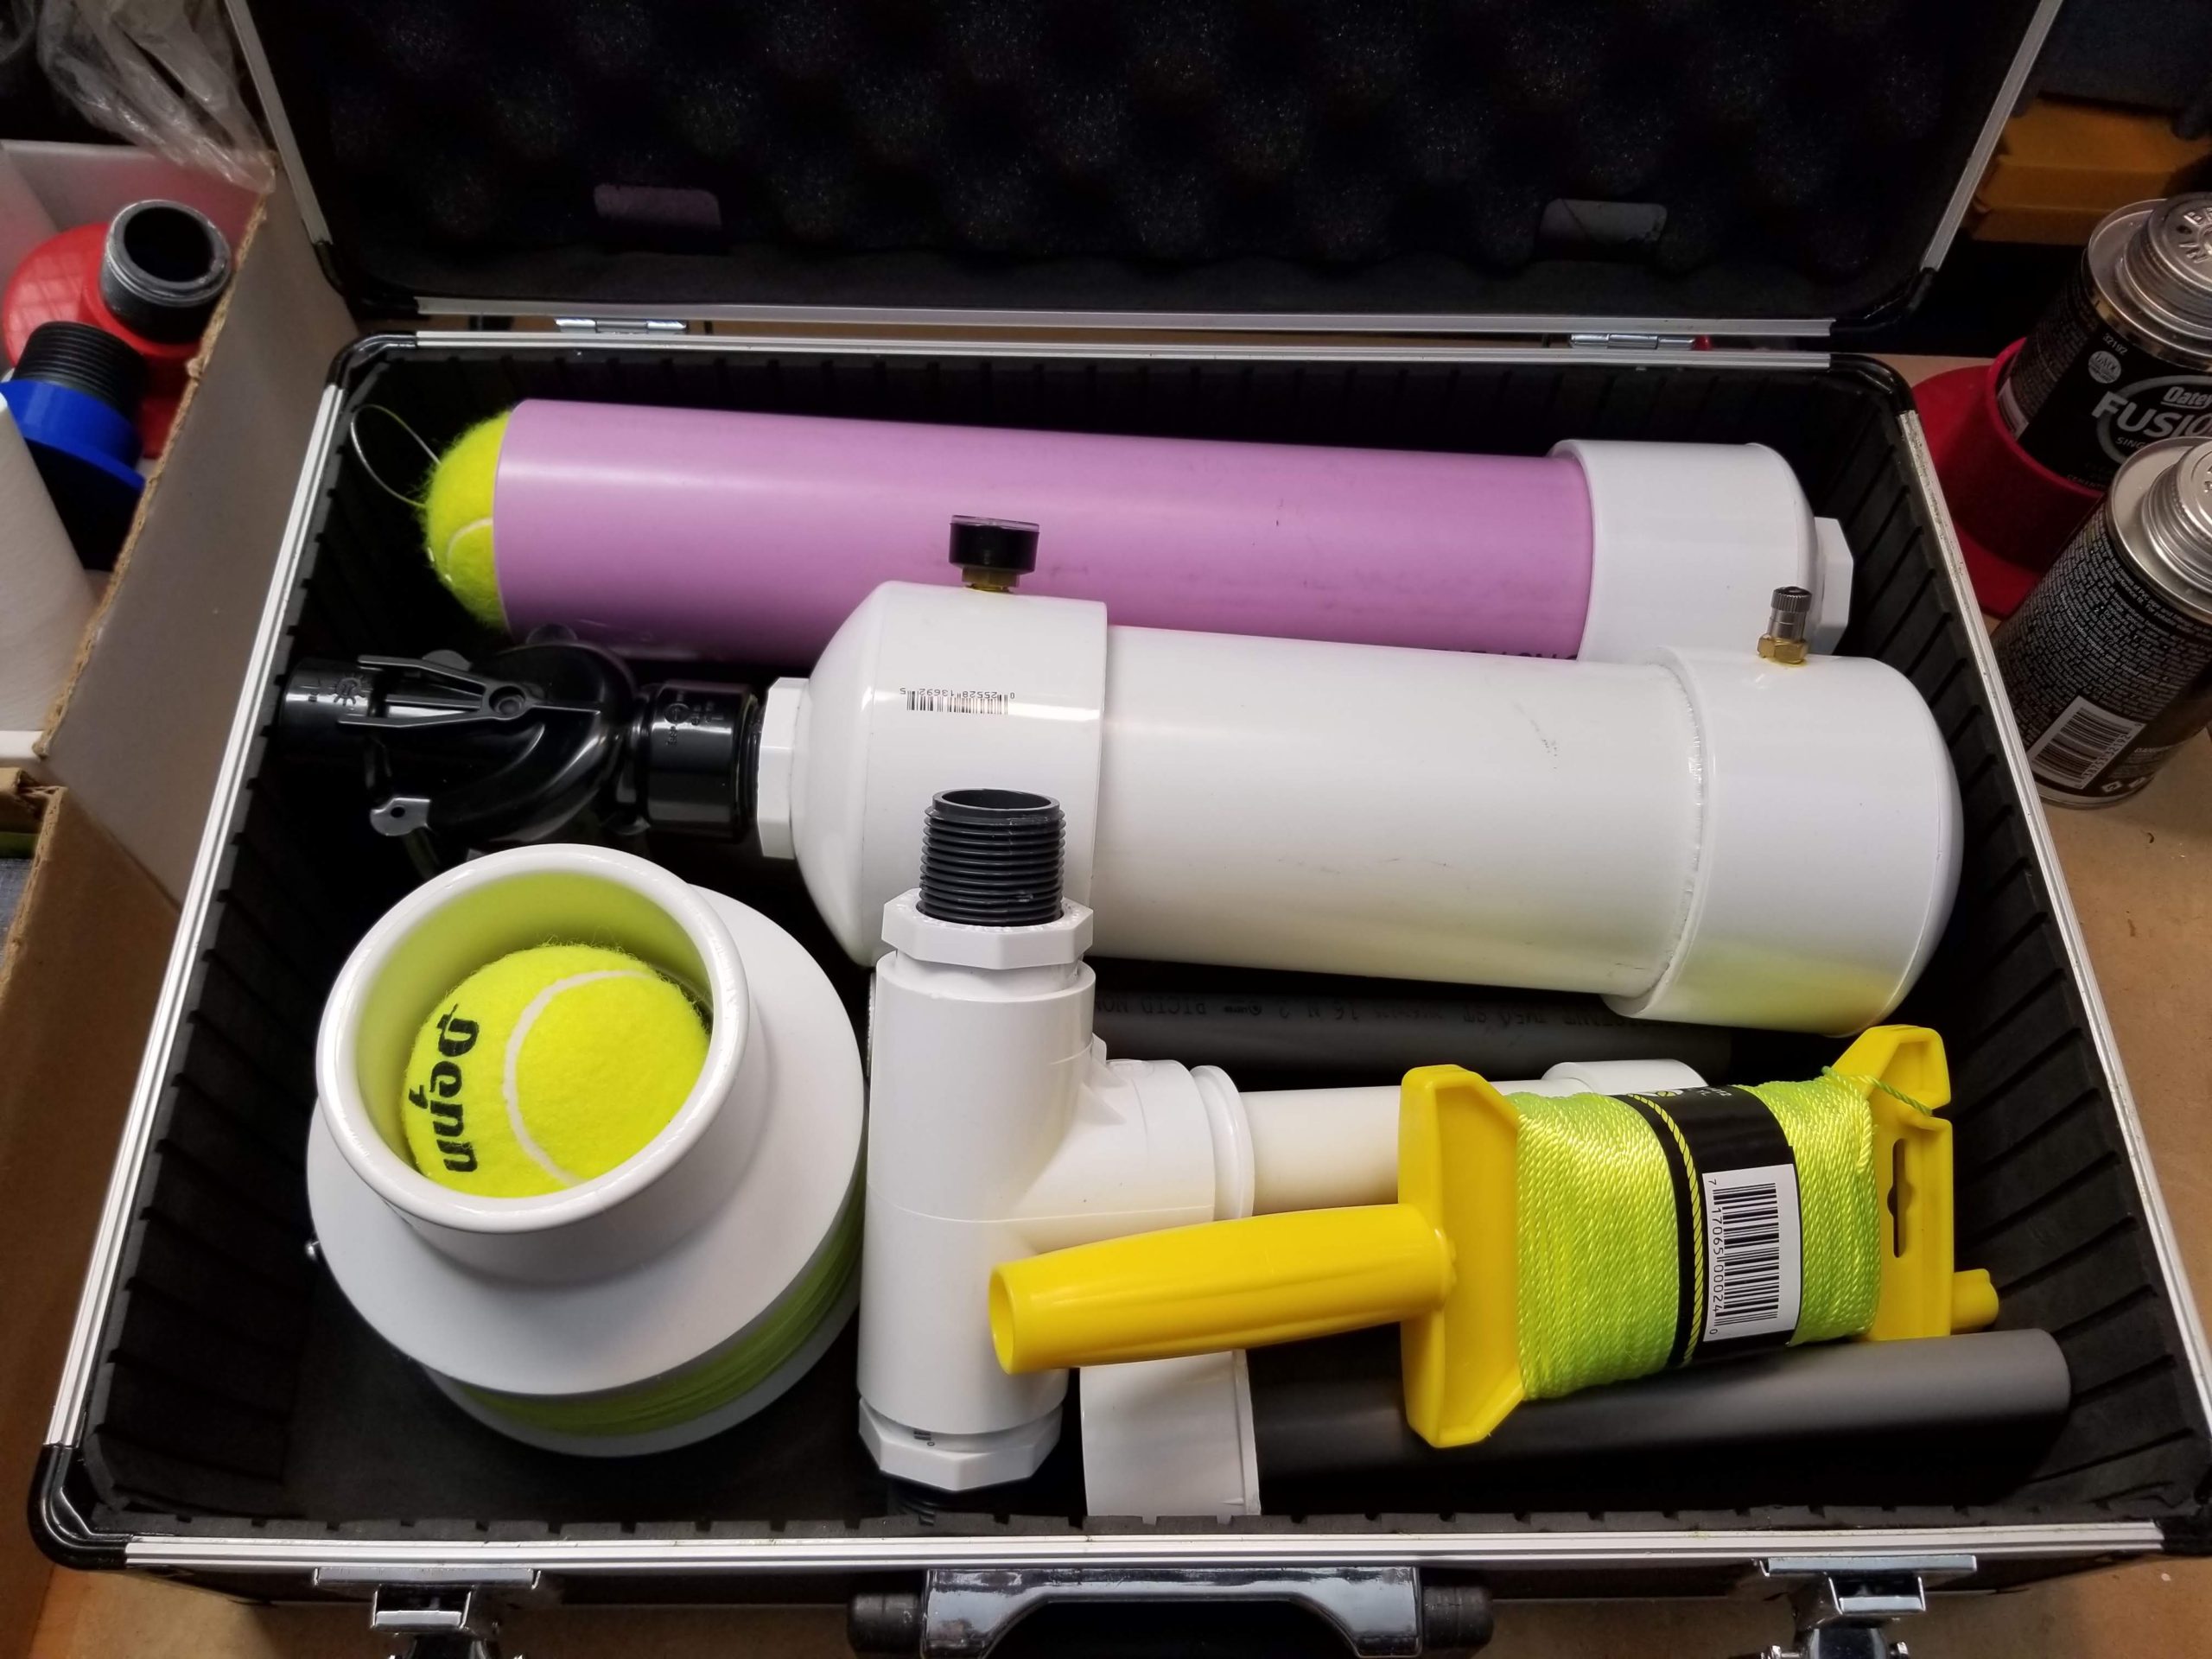
Launching Lines
We use 50 pound test braided premium superline for our launch lines. These are made from Spectra fibers that are strong, lightweight and have very little stretch. They are related to Kevlar which is used in tire belts and bulletproof vests. These lines are slippery and difficult to tie knots in. Some fishing line knots will work, others will just slip out. Here’s the manufacturer’s website on knots: Link to Knots
There are three common ways to attach the line to the launch ball. My favorite is to tie a loop to the end of the line that is larger than the launch ball, then put this loop through the loop on the ball and around the ball. This can be removed without cutting or untying a knot, but it is not always easy to do. Some users prefer to cut the line each time and tie a new knot to the loop. Some prefer to use fishing snap swivels. We tried these early on and had problems with them and no longer use them. But it is your choice.
Antenna Launching Safety
The Tennis Ball is propelled from the Launcher at (up to) velocities similar to a Tennis serve. This is enough velocity to cause potentially severe eye injury at close range. Always keep the launcher pointed in a safe direction, and do not pressurize the launcher until ready to launch. Eye protection such as goggles or safety glasses is recommended for those in close proximity to the pressurized launcher.
Power Line Electrical Safety
Do NOT launch near or over high (or even low) voltage power lines!!! Launch lines may be sufficiently conductive to cause potentially fatal shocks or arc flash explosions.
Operational and Storage Temperatures
PVC and other plastics lose strength at high temperatures and become brittle at low temperatures. Do not use a launcher that is outside the range of about 0 to 40 degrees C (30 to 100 degrees F). (Note that performance at low temperatures may be reduced due to the increased diaphragm stiffness.) Do not store launchers in direct Sunlight, hot vehicles or other locations that exceed 40C or 104F as the plastic may soften and deform.
Pressure Safety Relief Valve
If the pressure rating of the materials is exceeded the pressure chamber or valve may burst, potentially creating high velocity plastic fragments. Avoid exceeding the safe pressure ratings of the materials at all times. A Pressure Safety Relief Valve (brass cylinder behind the barrel) is recommended to prevent excessive pressure. Excess pressure is especially possible with high pressure systems or small unregulated electric pumps that can reach high pressures.
Periodic Maintenance
Inspect the launcher thoroughly each time it is prepared for use. Insure there are no cracks or other damage. Damaged launchers should be repaired, disabled or destroyed. Removing the main valve top is a good way to insure that the launcher is not pressurized. If the rubber diaphragm is damaged Rainbird makes rebuild kits, or contact us as we can obtain the proper spare parts.
Pressure Testing
Annual pressure testing is advised. After a thorough inspection cover the launcher with a heavy blanket, use eye protection and gloves and pump it to 90 psi and let it sit for 5 minutes or more to insure that it holds pressure safely. Bleed the pressure off by depressing the pin in the schrader (filling) valve or firing the unloaded launcher in a safe direction before storing it.
Hazards and Personal Protective Equipment
The hazards in Antenna Launching include (note that this is not an exhaustive list):
– High velocity Tennis Ball
– High velocity Fishing line
– Falling debris from Trees
– Plastic Fragments from a broken launcher
– Other hazards from the application environment
The recommended Personal Protective Equipment includes:
– Safety Goggles or Glasses
– Hard Hat
– Leather Gloves
– Closed toe Shoes
Launching Lines for Antennas
Planning the Launch
Select the supporting trees for the Antenna. Considerations include:
– Tree Height
– Suitability to support the Antenna Weight
– Spacing between the Trees
– Clearance Behind and Between the trees to get the Antenna up
– Proximity of Power Lines
– Proximity of vehicles, tents, buildings, and other items that might interfere with the installation or be damaged by errant balls
Tip: Launching over the top of the tree generally results in fewer problems than attempting to thread through the branches.
Selecting Launch Direction
The Launch Line is used to pull up a light support line, so launches generally are from the Antenna side launching out away from the Antenna. For a heavy antenna (such as a tri-band HF beam), the light line is used to pull a heavier line, so the launch is from the outside toward the antenna. A launch from the wrong direction can be ‘fixed’ by pulling a line through to the other side to reverse the direction of the end.
Selecting Trajectory
The height and distance of the launch trajectory can be selected to produce the most effective result. Launching too far can cause the line to get involved with trees behind the target. Launching too high allows the breeze to move the line away from the desired location.
Standing closer to the target tree reduces the horizontal distance the launch will go. Start about 20 feet from the tree (7 meters) and adjust as needed. To launch over a few trees at once start about the tree height away from the first tree. This will require aiming higher and will reduce the height of the trajectory. Adjust as needed.
Dealing with Wind
Wind doesn’t affect the launch ball too much, but it does blow the line. A perfect launch can be completely negated by wind blowing the line away from the tree. Two techniques help here. One is to use the wind to blow the line into the tree, shooting on the upwind side just below the tree’s full height. The other is to ‘touch’ the reel with a stick or gloved finger as the ball goes beyond the tree and pull the line into the tree. Only a brief touch is wanted, too much will pull the ball back into the far side of the tree and create a problem getting the ball down.
Selecting Launch Pressure
High launch pressure increases the velocity, height and distance covered by the ball. Launching too far or too short can cause tangles. Optimal launches go as high and far as needed but no more. If you need a high performance launch (150+ feet high) use full pressure (90 psi). Otherwise reduce it as needed. Typically 40-60 psi is adequate for a CSV17, or 30-50 for a CSV19.
Preparing for Launch
Attach the line to the ball. Two techniques for doing this: Tie the line to the loop, and cut it, or tie a loop in the line larger than the ball and thread this loop through the loop and around the ball. In the loop case the ball can be detached without cutting the line, though it can be a little fiddly to detach. Use knots appropriate for the line you have, if using our line it is a braided Spectra type fishing line. Some knots will pull right out with these types of lines. There are plenty of internet sites that show how to tie knots for these fishing lines. My favorite is a loop larger than the launch ball anchored by a figure 8 knot.
Push the ball down the barrel all the way using the ramrod. Situate the line as needed from the reel going into the barrel. Extra line can be pushed into the barrel. Make certain the line is not going to tangle or catch on anything or it will snap during launch.
If you use the screw/O ring retainer on the Mini Coaxial Reel make sure the line is just barely caught under the O ring and only on the barrel side of the screw. Alternately little bits of blue masking tape can be used to hold the line in place, just don’t make it too secure as it needs to pull out at high speed to follow the launch ball.
Move to the launch position. Insure personnel in the area are aware of the imminent launch and have appropriate safety gear. Insure the landing area is clear. Pressurize the launcher. Use sufficient pressure but not excessive pressure to avoid launching too far beyond the target tree. Experience will be useful here, but pressures from 40 psi to 90 psi are generally used with the CSV17, and pressures from 30 psi to 80 psi are generally used with the CSV19 launchers.
Safety Tip: Avoid carrying a charged launcher around. Pressurize at or near the location and time of launch. Point the launcher in a safe direction, even when it is not charged. Pressure can be safely vented without launching by pushing the pin in the middle of the Schrader (tire) valve (charging port).
Pressurizing the Launcher
Extensive Separate Document on Pressurizing the Launcher
Pressurize the launcher with an electric, hand or foot pump, or use CO2 or High Pressure Air with the appropriate regulators and/or adapters. The Ryobi P737 18 volt battery operated small tool type compressor is one of my favorites, or a Paintball CO2 or HPA tank with a Pressure Regulator fitted with a tire chuck. A bicycle tire filling adapter works with 12 or 16 gram CO2 cylinders, especially on the CSV17’s smaller tank. Use the gauge on the launcher and/or the pressure source to read the pressure and stop at your chosen value. Do not pressurize the launcher over 90 psi.
Launching
Hold the launcher at arms length and look an inch or two over the top of and parallel to barrel to form a sight picture. Put the right hand on the trigger, and use the left hand to support the pressure chamber underneath. Point the launcher slightly above the tree (and offset toward the wind as appropriate). Operate the launcher by pulling the trigger quickly without jerking the launcher and spoiling the aim. Do not squeeze the trigger slowly as this may cause a squib or low powered launch.
After the Launch
Work the ball down to the ground if it does not fall directly. Remove the ball from the launch line and attach the launch line to the nylon twine. Note that the launch line itself is not generally suitable for directly supporting antennas. Instead we use yellow nylon Mason construction twine, but other light weight lines may be suitable. This line is adequate for short term temporary antennas, or it can be used to pull up a heavier or more permanent Dacron type antenna support line. If a heavy line or steel cable is the goal several intermediate stages will help insure success.
Gloves are recommended when winding and handling the launch line in to avoid cuts. Remove the reel from the launcher (it should be a friction fit). Wind the launch line back on the reel with light tension on the reel, towing the nylon twine over the tree. Do not rotate the reel when rewinding, and do not wind the reel with too much line tension. The line should go back on the way it came off to avoid line twist, wind it over the front and onto the reel with light tension. Untie the lines and attach the nylon twine to the antenna, or to a heavier line and pull it up…
If the ball becomes tangled in the foliage wrap a few turns of the launch line around a stick and (with gloves on) hold the stick and line while backing up slowly till the ball comes free or the line snaps.
Troubleshooting
If you have problems with your launcher, see “Launcher Troubleshooting” under the Info Tab of the akbeng.com website (http://www.akbeng.com/info).
—-
Alan, W6AKB (send comments, questions and suggestions on this document to sales at this website)